
Why go out and buy a ton of unpersonalized correspondence cards when you can just as easily make your own of a more personalized nature? I love creating my own photography correspondence cards because they combine the creativity of my photography, the craftiness of design and the easy to read nature of computer printing.
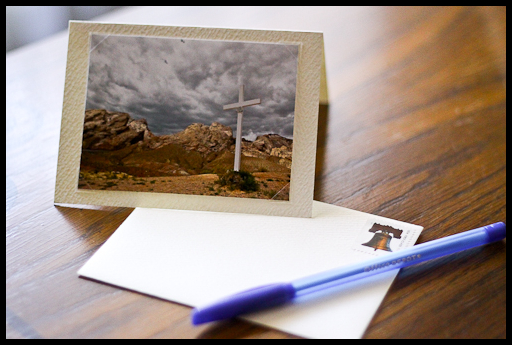
This particular card was a condolence for a friend's father's passing. Hence, the photo of a cross that I took during a road trip in Utah last year.
Now, let's begin...

Last year, I bought a pack of Strathmore's 10 Black Announcement Cards and Envelopes, in Palm Beach white, during a store liquidation sale at a local Aaron Brother's. I knew I wanted to do something with them. I just didn't know what.
Until, one day, during a spark of genius and a few tries in figuring it out, I developed this:
What you'll need:
 | Strathmore's 10 Black Announcement Cards and Envelopes |
 | Photo corners of your choice. |
Additional: I use Adobe Lightroom for photography management and printing and and Microsoft Word for word processing. You can use whatever is applicable on your computer. | |
Let's begin...
| Step 1: | I used Adobe Lightroom for managing and printing my potential photographs. These are my configurations for printing to my Epson Stylus Pro 3800: |
| Step 2: | Cut our your desired photo. I use my dulled rotary cutter that I have for paper cutting and a clear straight edge: |
| Step 3: | Using Microsoft Word and my HP Photosmart Premium, these are my margins to print on the card: |
| Step 4: | These are my page setup margins in Word for proper word placement below the fold of the card: |
| Step 5: | Print the card. If you're confused, take a deep breath and do a test page or two. This is the result: |
| Step 6: | Use the photo corners to attach the cut photo to the top of the card. There you go!  |
No comments:
Post a Comment